Pulse – Flashing LED using micro:bit
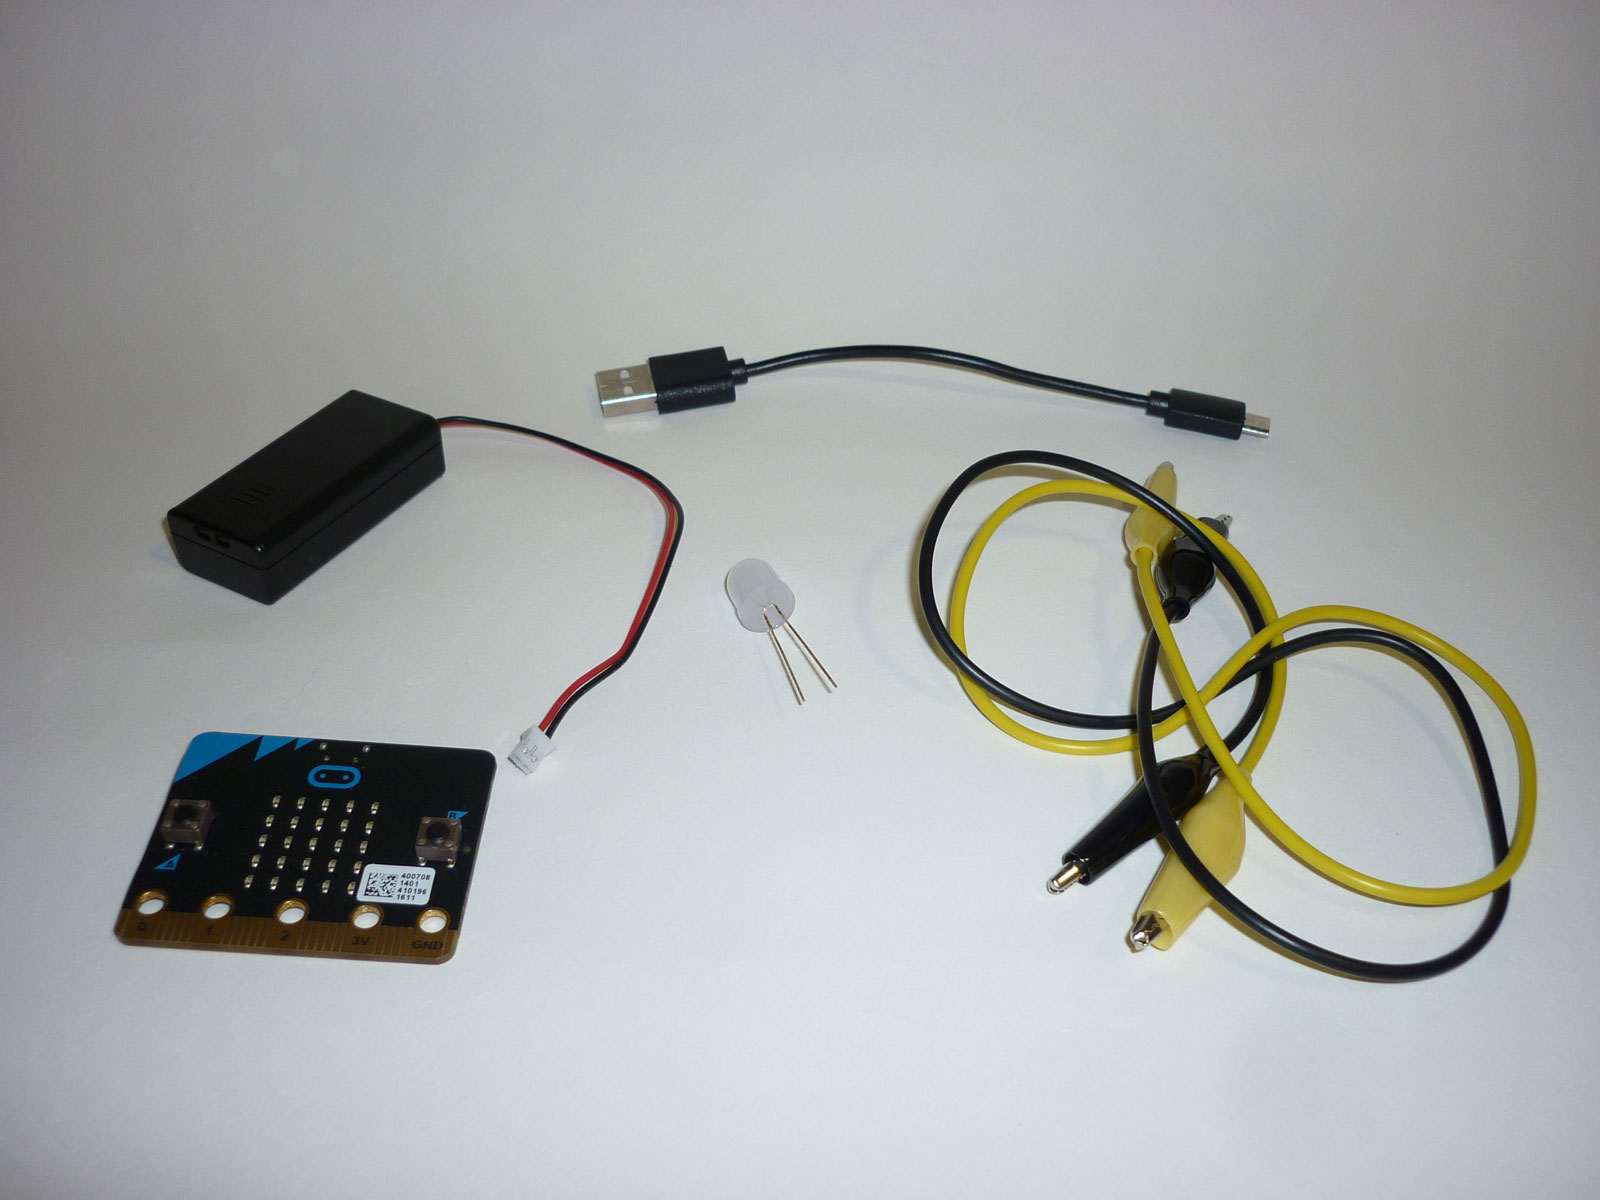
You’ll need:
- A micro:bit
- A USB cable to link your micro:bit to the computer
- A battery pack
- Two crocodile clip connectors
- An LED
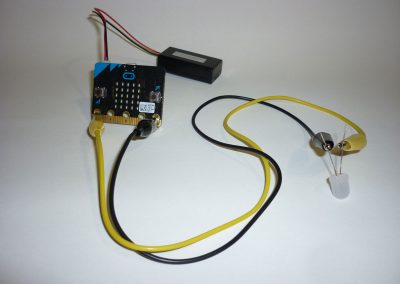
Connect your micro:bit
- the Ground (GND) pin to the smaller of the two legs of the LED
- Data pin 0 (0) to the other, larger leg of the LED
It should look like this:
Make sure that the two legs and connectors are not touching each other.
We’ve created an electronic circuit that uses power from the micro:bit to turn on the LED, but we can turn this on and off by changing the state of pin 0.

As before, we first we need to load the micro:bit libraries so that we can access all the micro:bit functions.
Now we can light the LED by setting the state pin 0 to high (1). By doing this we are turning pin 0 on and completing the electric circuit.
Try it: download to the micro:bit and check the LED is lit. If not, check your connections.
# Load the micro:bit libraries
from microbit import *

# Set pin 0 high (turn it on)
pin0.write_digital(1)
We need a pause in between otherwise it would be too fast to see. We are using the sleep command with 500 milliseconds so the LED should stay lit for half a second
Finally, we put this in a forever loop. Remember to be careful to tab out the code inside the loop.
Try it: the LED should now be flashing
# Load the micro:bit libraries
from microbit import *

# Loop forever
while True:
    # Set pin 0 high (turn it on)
    pin0.write_digital(1)
    sleep(500)
    # Set pin 0 low (turn it off)
    pin0.write_digital(0)
    sleep(500)
Try changing the value of pulse, download it and see the effect.
# Load the micro:bit libraries
from microbit import *

# Set starting pulse at 0.5s
pulse = 500

# Loop forever
while True:
    # Set pin 0 high (turn it on)
    pin0.write_digital(1)
    sleep(pulse)
    # Set pin 0 low (turn it off)
    pin0.write_digital(0)
    sleep(pulse)
Add this to your code, and try it. Pressing A increase the pulse by 0.1 seconds making the delay longer. Pressing B does the opposite.
Finally, add some images so that we get some extra feedback when we press a button:
# Load the micro:bit libraries
from microbit import *

# Set starting pulse at 0.5s
pulse = 500

while True:
    # Set pin 0 high (turn it on)
    pin0.write_digital(1)
    sleep(pulse)
    # Set pin 0 low (turn it off)
    pin0.write_digital(0)
    sleep(pulse)

    # Check for increase/decrease
    if button_a.was_pressed():
        display.show(Image.ARROW_N)
        pulse = pulse + 100
    elif button_b.was_pressed():
        display.show(Image.ARROW_S)
        pulse = pulse - 100


Soil Moisture Sensor for micro:bit
micro:bit, micro:bit Connecting, Moisture