Using NeoPixel LEDs with micro:bit
You’ll need:
- A micro:bit
- An LED matrix such as the Kitronic ZIP Halo:
https://www.kitronik.co.uk/5625-zip-halo-for-the-bbc-microbit.html - A micro:bit battery pack
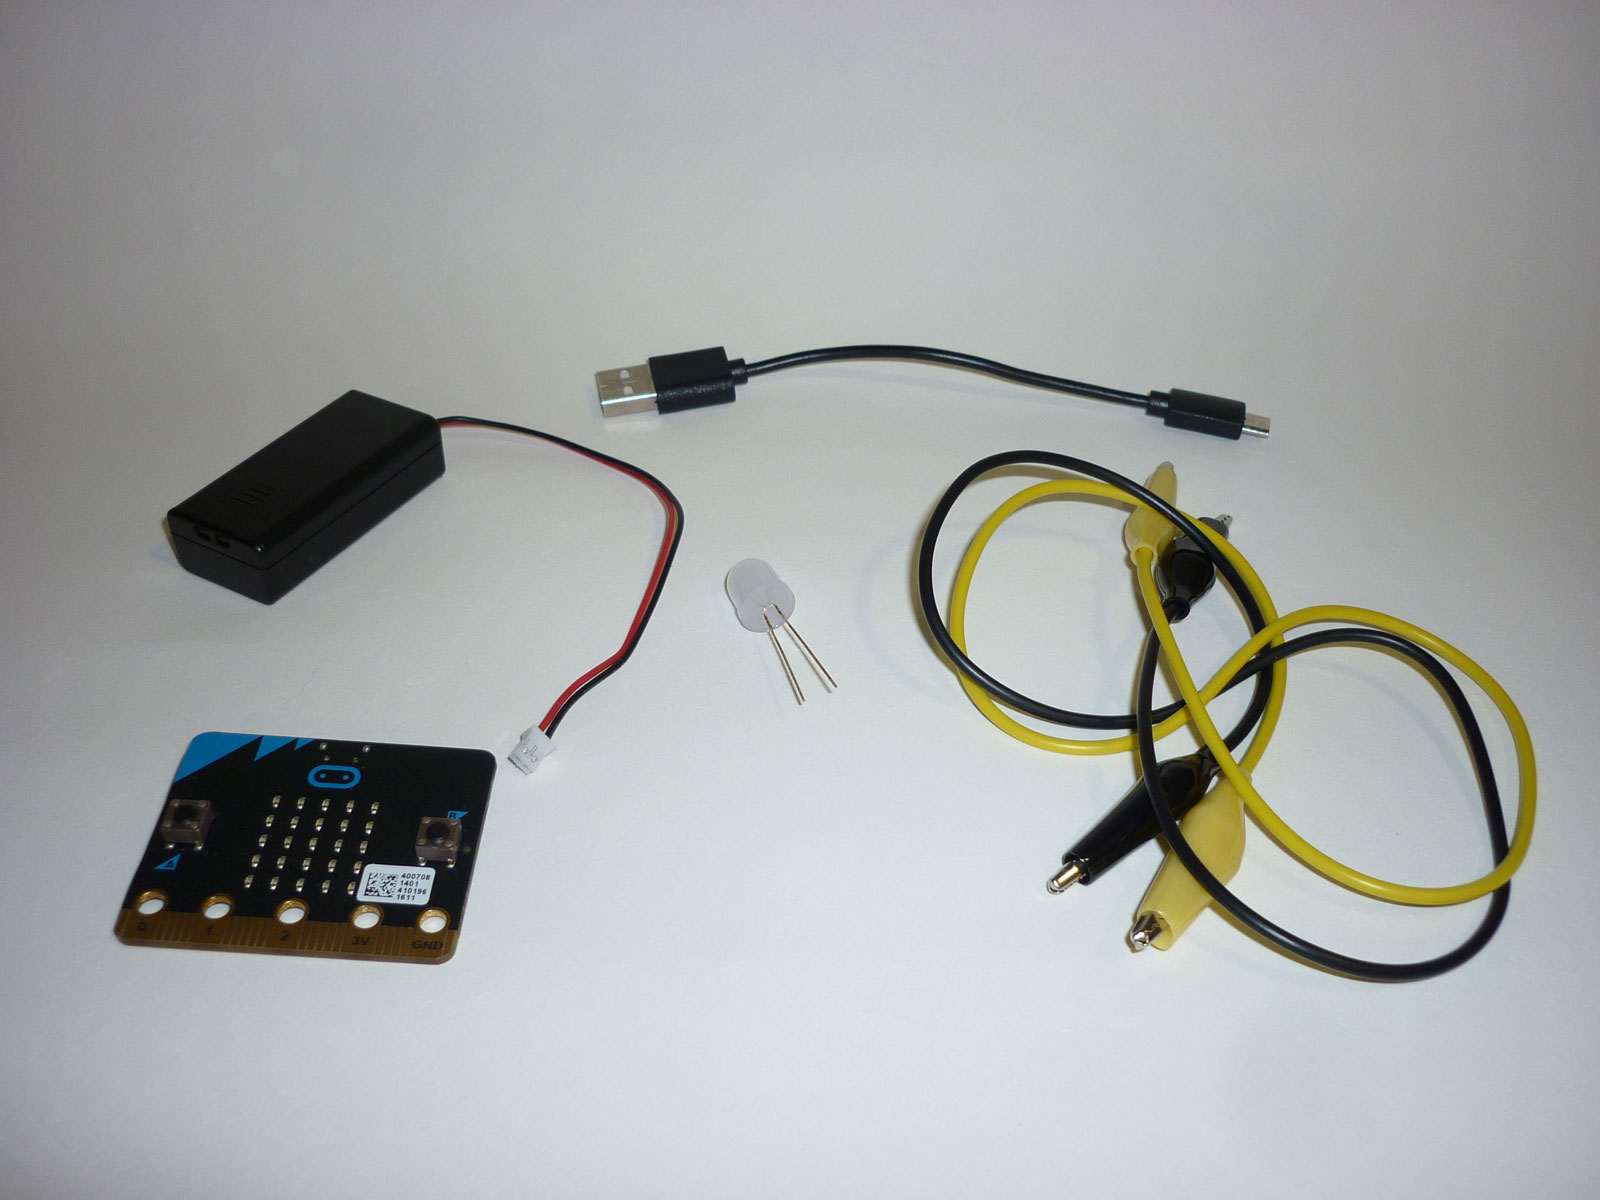
Connect your micro:bit
Connect the battery pack to the Halo’s power socket, not the micro:bit’s.
Once complete, it should look like this:
Plug the USB cable into USB socket on your computer so that you can flash you code onto the micro:bit.
PeoPixel LED Code
Colours
Colours are defined using a system called RGB, which stands for Red, Green, Blue.
A colour is made by setting a value for red, blue and green, where each value is between 0 and 255, where 255 is the brightest. The number of possible combinations is more than 16 million.
For example, to create red, set a value for red but leave blue and green set to 0. So:
- red is 255, 0, 0 (bright)
- blue is 0,127, 0 (not so bright)
- green is 0, 0, 63 (even less bright)
Or combine colours, like these:
- Orange = 255, 127, 0
- Purple = 127, 0, 255
- Brown is 127, 63, 31
To test everything is working, type in this code.
# halo_fun
# Working with LEDs using NeoPixel Strip

# import microbit libraries
from microbit import *

# Import NeoPixel libraries
import neopixel

# Setup the Neopixel strip on pin0 with a length of 24 LEDs
# These will be numbered 0 to 23
np = neopixel.NeoPixel(pin0, 24)

# Start by clearing the display
np.clear()

# Create a colour (red)
colour = (128, 0, 0)

# Set the first LED to the new colour
np[0] = colour

# Show the LEDs with the new settings
np.show()
Using Loops
One of the best ways to use LEDs is in loops. Here we’ve altered the code to set every LED to the same colour:
# halo_fun
# Working with LEDs using NeoPixel Strip

# import microbit libraries
from microbit import *

# Import NeoPixel libraries
import neopixel

# Setup the Neopixel strip on pin0 with a length of 24 LEDs
# These will be numbered 0 to 23
np = neopixel.NeoPixel(pin0, 24)

# Start by clearing the display
np.clear()

# Create a colour (red)
colour = (128, 0, 0)

# Set each LED to the new colour using a variable called led
for led in range(0, 23):
    np[led] = colour

# Show the LEDs with the new settings
np.show()
The range Function
Python’s range() function is a loop that makes a variable count up (or down). There are three ways to use the range() function.
The first just specifies how many times to count, one at a time, like this:
IyBjb3VudCBmcm9tIDAgdG8gMgpmb3IgaSBpbiByYW5nZSgzKToKICAgIHByaW50KGkpCg==# count from 2 to 5
for i in range(2, 6):
print(i)
# count from 20 to 40 in steps of 10
for i in range(20, 50, 10):
    print(i)
Random Colours
We can use random numbers to generate different colours instead of just red. To do this we need to load an extra code library so that we can use random numbers. Add this near the top with the other import statements:
# import random number library
from random import randint
# Create a colour (red)
colour = (128, 0, 0)
# Create a colour (random red, green & blue)
red = randint(0, 127)
green = randint(0, 127)
blue = randint(0, 127)
colour = (red, green, blue)
Other Colours
To turn an LED off we set the colour to black. This is where there is no red, no green and no blue, like this:
# turn off LED (set colour to black)
colour = (0, 0, 0)
# bright white
colour = (255, 255, 255)
Moving Lights
Using the same loop we can make it look like a colour is moving around the LEDs. The trick is turn off the previous LED before turning on the next one.
As we loop through each LED from 0 to 23 we can calculate the number of the previous LED because it will be one less than the current one. If we are about to turn on LED number 7 we know that the previous one was number 6:
for led in range(0, 24):
    # calculate previous LED number
    old_led = led – 1
for led in range(0, 24):
    # if we are on the first LED (number 0), get the last one
    if led == 0:
        old_led = 23
    else:
        old_led = led – 1
Completed LED Project Code
# halo_spin.py
# Richard
# LED halo random spinning colours

# import microbit libraries
from microbit import *

# import random number library
from random import randint

# Import NeoPixel libraries
import neopixel

# How many LEDs are there
max_leds = 24

# Setup the Neopixel strip on pin0 with the length of the LED strip
# These are numbered from 0 upwards
np = neopixel.NeoPixel(pin0, max_leds)

# Start by clearing the display
np.clear()

# Create a colour to turn off an LED
off = (0, 0, 0)

# Loop Forever
while True:
    # Choose a random colour
    red = randint(0, 63)
    green = randint(0, 63)
    blue = randint(0, 63)
    colour = (red, green, blue)

    # Loop through each LED
    for led in range(0, max_leds):
        # Set the led to the colour
        np[led] = colour

        # if we are on the first LED (numer 0), get the last one
        if led == 0:
            old_led = max_leds - 1
        else:
            old_led = led - 1

        # set the old LED to off (black)
        np[old_led] = off

        # Show the LEDs with the new settings
        np.show()

        # pause to slow things down
        sleep(25)


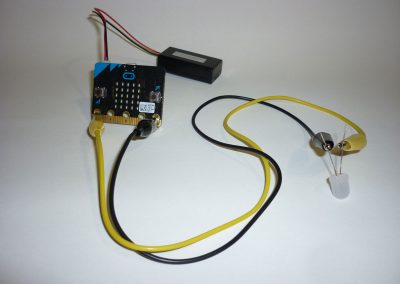
Soil Moisture Sensor for micro:bit
micro:bit, micro:bit Connecting, Moisture